How to Redact Documents with iDox.ai.
With iDox.ai, you can effortlessly obscure sensitive information such as credit card numbers, social security numbers, medical information, and other personal details when sharing files. This feature is particularly invaluable for establishing secure communication channels between various entities, including businesses and customers, medical providers and insurance companies, educational institutions, and students, as well as law firms and courts.
Below is the step-by-step guide for using iDox.ai's powerful AI backed redaction tool.
Step 1: Login and Access Redaction
· Begin by logging into your iDox.ai account.
· Once logged in, you will enter the homepage and you can select iDox.ai Suite™.
· Once logged in, you will enter the homepage and you can select iDox.ai Suite™.

Step 2: Experience our user-friendly interaction process for creating redaction.
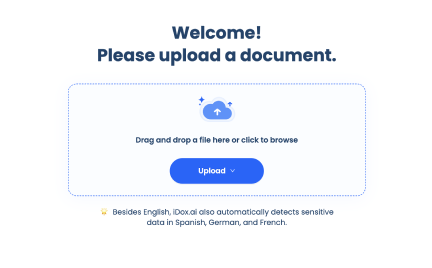
2-1 : We will guide you to upload the document that you need to redact.
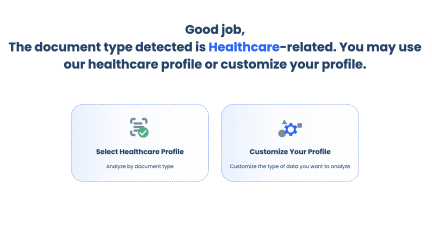
2-3 : We will automatically detect the type of your document and recommend corresponding profiles for you to conduct redaction.
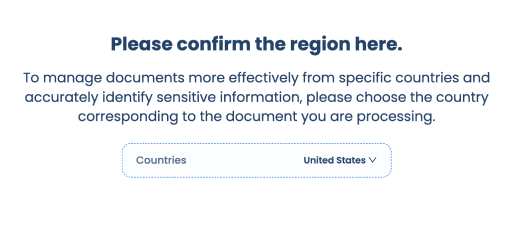
2-2 : In order to redact documents from specific countries more accurately, you can select the national region that needs to be processed.
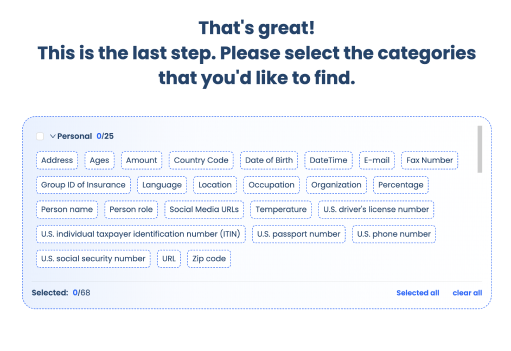
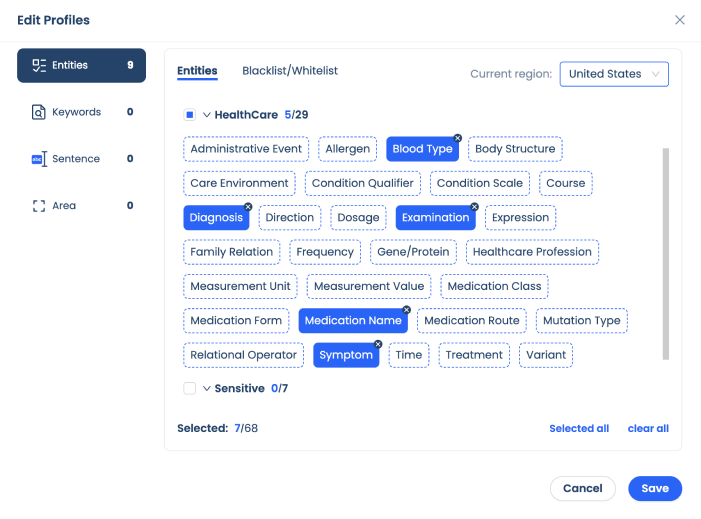
2-4 : If you are very clear about what you need to find, you can select entities in a customized way. Our AI engine will find sensitive information for you.
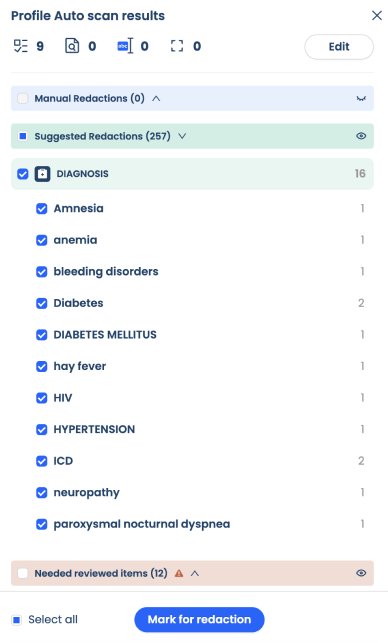
2-5 : If you choose the profile we recommend, our AI engine will also find sensitive information in your document for you, And the search results will be displayed in the opened document.

Step 3: Experience fast and smooth marking of sensitive data.
3-1 : The results found by the AI engine are displayed in the right panel. You can select multiple results and mark them with one click.
3-2 : You can also select specific parts of the content in the document to mark.
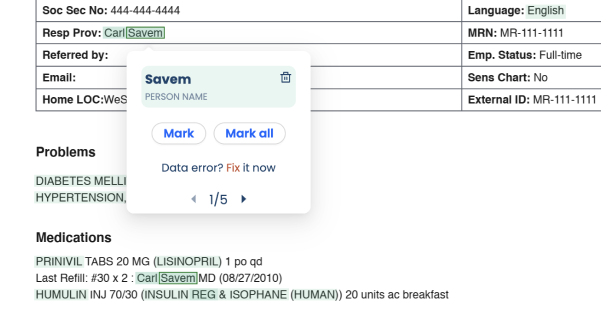
3-3 : If there are additional contents that need to be marked beyond what the AI has found, you can also use manual tools or keywords to add them.

3-4 : You can also edit your profile to refine it to your desired state, making it usable for more similar documents.
Step 4: A more user-centric interaction design experience, ensuring each step is intuitive and satisfying.
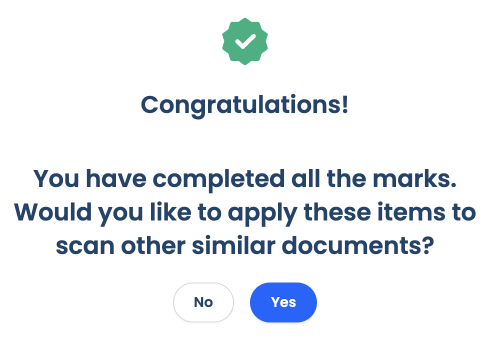
When you have completed marking the AI results, a friendly prompt will appear, asking if you still need to apply it to other similar documents. If your answer is yes, a dropdown will appear for you to select other documents.

If your answer is no, a question will appear, asking whether you want to export or share the document next.

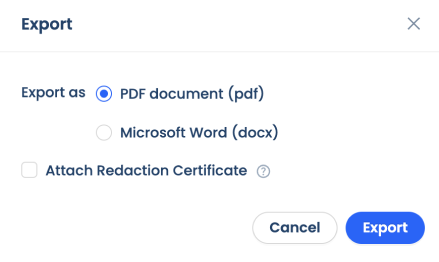
If your answer is "Export", the export pop-up box will be called up for you. You can export the document that has been redacted.
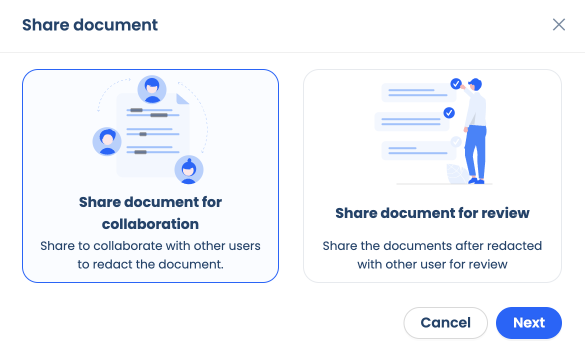
If your answer is "Share", the share document pop-up box will be called up for you. You can share the document as well.
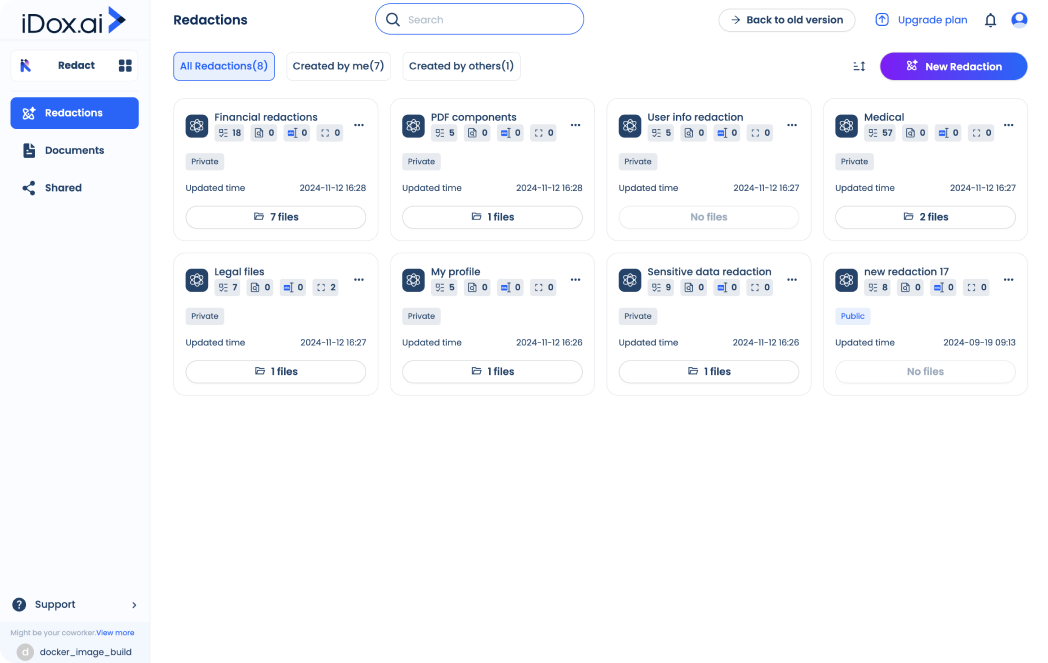
Step 5: Easy to manage your redactions and documents in Redact app.
Here you can manage your redaction very well. Each redaction can be set to contain different mark objects. You can more quickly select existing redaction to process similar documents.
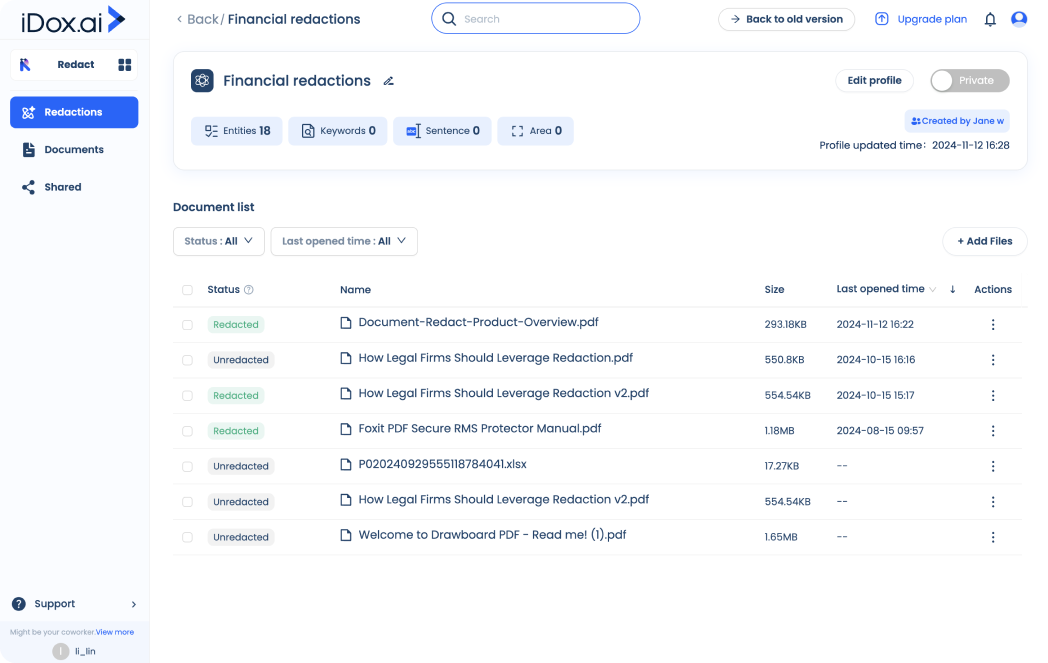
Click on each redaction to enter the document list of the redaction. Here you can see all the documents in the current redaction. You can filter and view documents in different states through the filter at the top. You can also add files to this redaction as well.
By following these steps, you can efficiently redact sensitive information from your documents using iDox.ai.
